Loan Servicing

Quickstart: Obtaining Creditor Filing Privileges in the Bankruptcy Court

Marco Varela

Marco Varela

Marco Varela

Jul 21 20266 minute read

Most bankruptcy districts let creditors file a proof of claim through ePOC, the court's electronic proof of claim tool. But not all of them do, and a claim you can't file is revenue you can't recover.

This guide helps creditors set up creditor filing privileges. Once you have Case Management/Electronic Case Files, or CM/ECF access in the districts that need it, your team can file every proof of claim through a single BankruptcyWatch Platform form, regardless of which district the case is in.

1. Set up your PACER account

Register for PACER

If you don't have an account yet, follow the official steps to register for a PACER account.

If you are using BankruptcyWatch, our system connects with your normal PACER account. There are no special steps needed.

Confirm you have a NextGen PACER account

Filing privileges require a NextGen account. Two quick ways to check:

  • Accounts created within the last 4 years are likely to be NextGen accounts.
  • If your account is more than 4 years old, log in to Manage My Account and check your 'Account Type.' A NextGen account displays as an "Upgraded PACER Account."

If you need to upgrade your PACER account to a NextGen PACER account, follow the official steps to upgrade your PACER account.
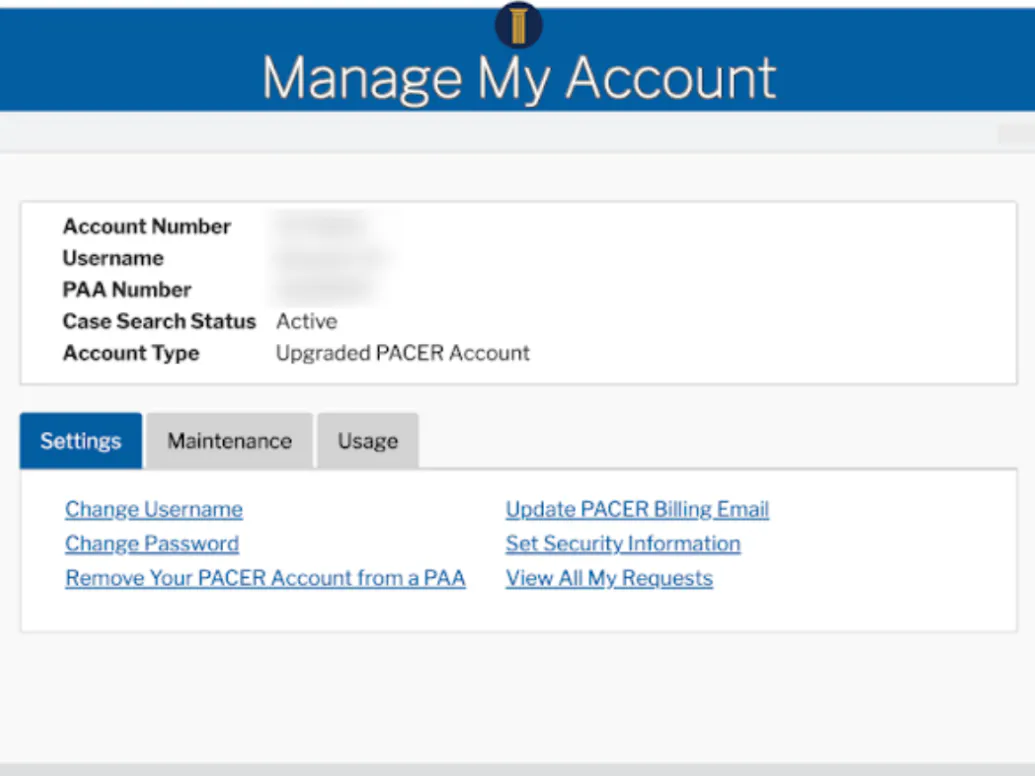
	PACER Manage My Account screen showing the 'Account Type' field labeled "Upgraded PACER Account," confirming a NextGen account

2. Request CM/ECF filing privileges

Some districts don't offer ePOC at all. Others have an ePOC process that isn't supported for automated filing. Either way, you can still file through Platform or the BankruptcyWatch API; you just need CM/ECF filing privileges in that district first.

Check our spreadsheet of districts that support ePOC, including their filing URLs, then work through the steps below for each district on your list that doesn't.

Request CM/ECF filing privileges in PACER

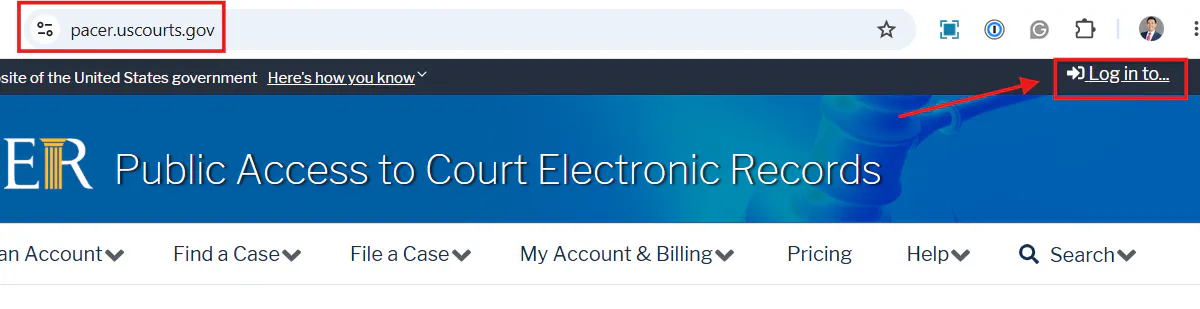
PACER homepage with the "Log in..." button highlighted in the top navigation bar
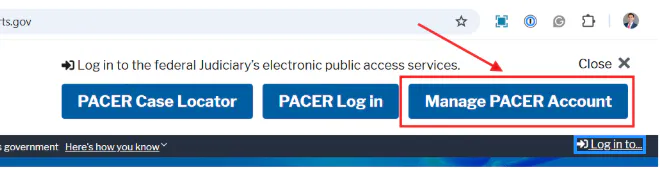
  • Select 'Log in.'
  • Select 'Manage PACER Account.'
PACER homepage showing the "Log in" and "Manage PACER Account" options
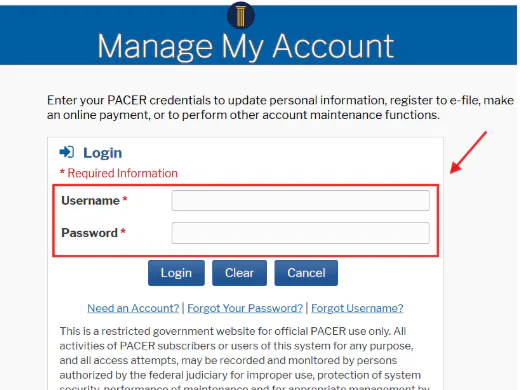
  • Enter your individual PACER account username and password.
	PACER login screen with username and password fields ready for individual account credentials
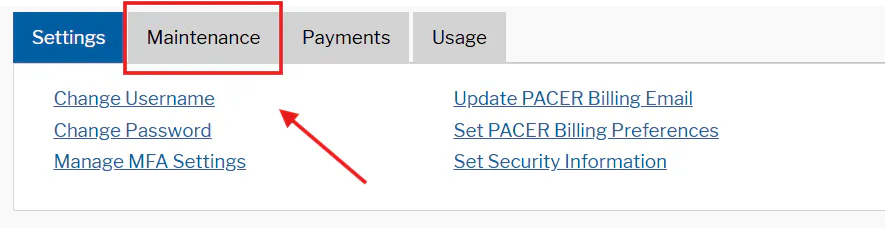
  • Select 'Maintenance.'
PACER account dashboard with the Maintenance tab selected
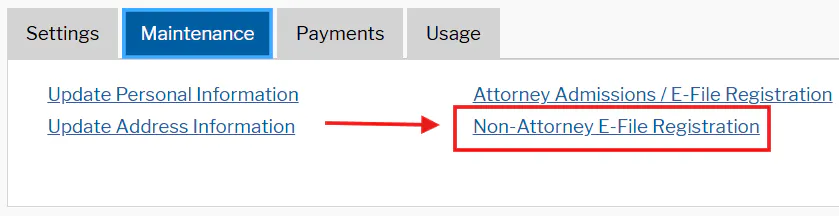
  • Select 'Non-Attorney E-File Registration.'
Maintenance tab menu with the "Non-Attorney E-File Registration" link highlighted
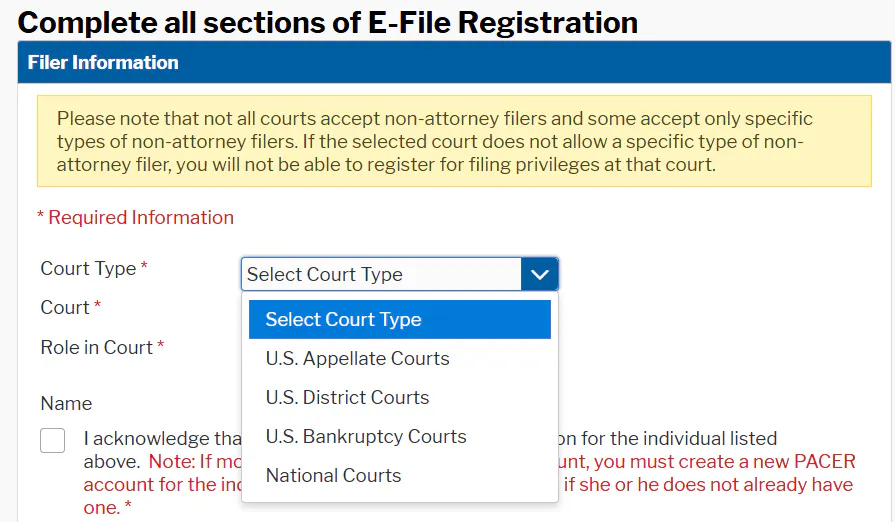
  • From the 'Role in Court' drop-down list, select the appropriate filing role.
  • Complete all the registration fields.
  • Select 'Next.'
	Non-attorney e-file registration form showing the Role in Court drop-down list and required registration fields
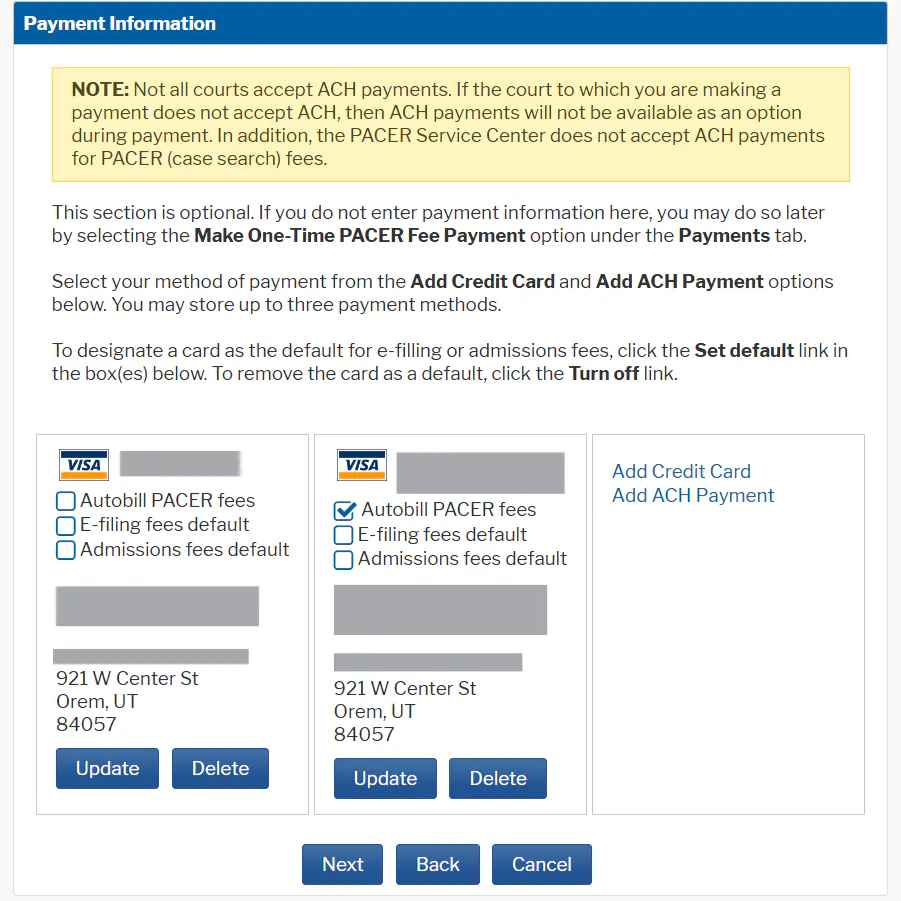
  • The payment information screen displays; you are not required to set default information.
  • Select 'Next' when finished, or to bypass the screen.
	PACER payment information screen with optional default payment fields
  • Review the non-attorney e-filing terms and conditions and the court’s policies and procedures.
  • Check the first box to acknowledge that you agree to the terms and conditions, which acts as your signature for registration.
  • Check the second box to acknowledge that you have read and agree to the court’s policies and procedures.
  • Select 'Submit.'
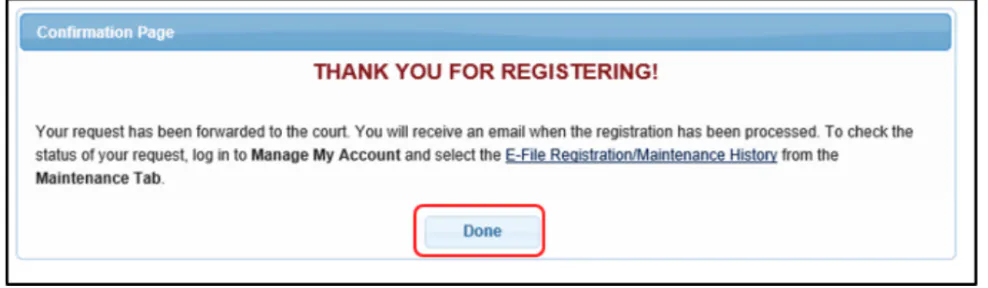
  • The confirmation page will display.
  • Select 'Done' to close the window.
Registration confirmation pop-up, confirming the filing privilege request was submitted

PACER will forward your request to the court. If the court has questions about your registration, the court will contact you by email or phone. Once the court processes your request, PACER sends you a confirmation email, and you're live in that district.

A handful of districts ask for an additional request form to be completed and emailed in. Contact our team, and we'll help you obtain the standard forms and direct you to the appropriate recipient.